Milk-V Duo: Compiling, Running, and Debugging Using the riscv64-unknown-linux-musl-bin Toolchain
Setting Up the Compilation Environment
-
Install the RuyiSDK package manager Reference
-
Installing the toolchain: this guide uses the gnu-milkv-milkv-duo-musl compiler as an example (you may adjust the toolchain and version as needed).
bash
View resources in the software repository
$ ruyi list --name-contains milkv --category-is toolchain
Install the specified toolchain
$ ruyi install gnu-milkv-milkv-duo-musl-bin
From the returned information, you can view the installation path, e.g., ~/.local/share/ruyi/binaries/x86_64/gnu-milkv-milkv-duo-musl-bin-0.20240731.0+git.67688c7335e7
3. Create and use the Duo compilation environment

```bash
# View ruyi pre-configured environments
$ ruyi list profiles

# Create a virtual environment: toolchain is gnu-milkv-milkv-duo-musl-bin
$ ruyi venv -t gnu-milkv-milkv-duo-musl-bin milkv-duo ./venv-milkvduo
Developing in the IDE
Preparing the Source Code
This article uses the application example duo-examples for the milkv-duo development board. Use either of the following methods to obtain the source code:
# Method 1: git clone
$ git clone https://github.com/milkv-duo/duo-examples.git

# Method 2: ruyi extract command
$ ruyi extract milkv-duo-examples
Importing and Setting Project Properties
-
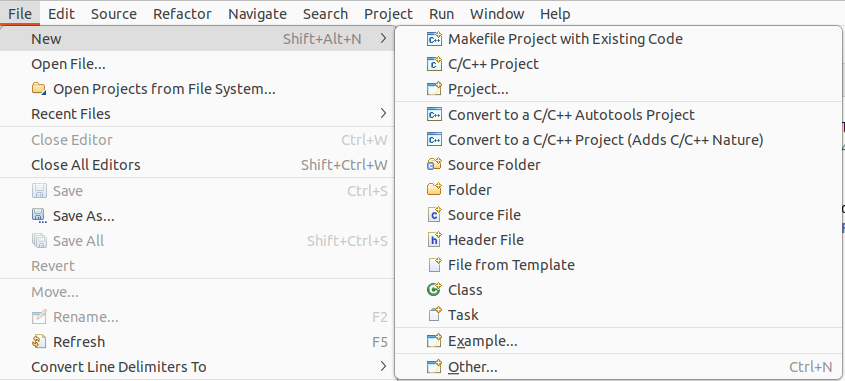
File > New > Project
-
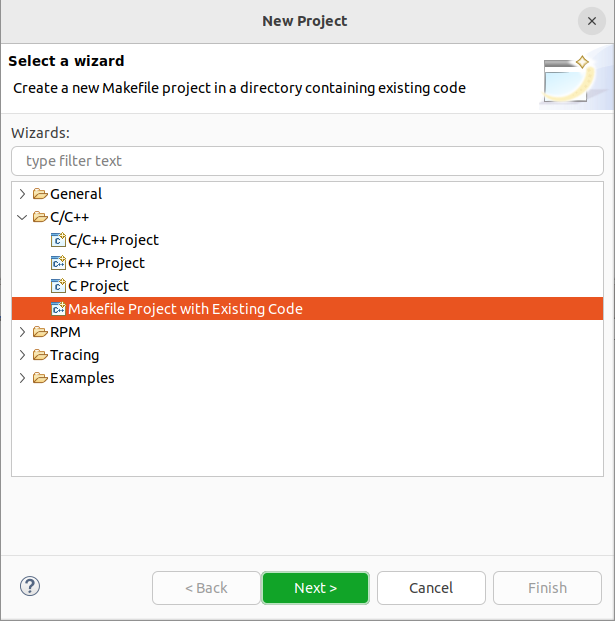
Select C/C++ > Makefile Project with Existing Code > Next
-
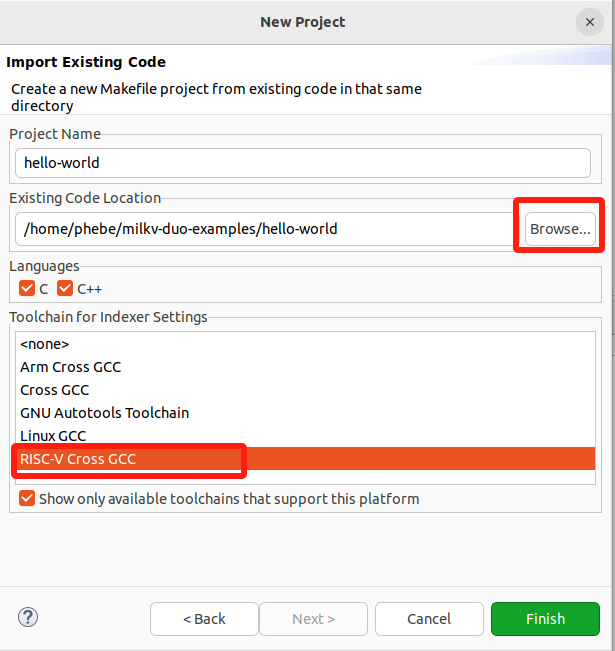
Import the prepared source code:
-
Click Browse > Target source code path
-
Toolchain for Indexer Settings:Select RISC-V Cross GCC
-
Finish
-
-
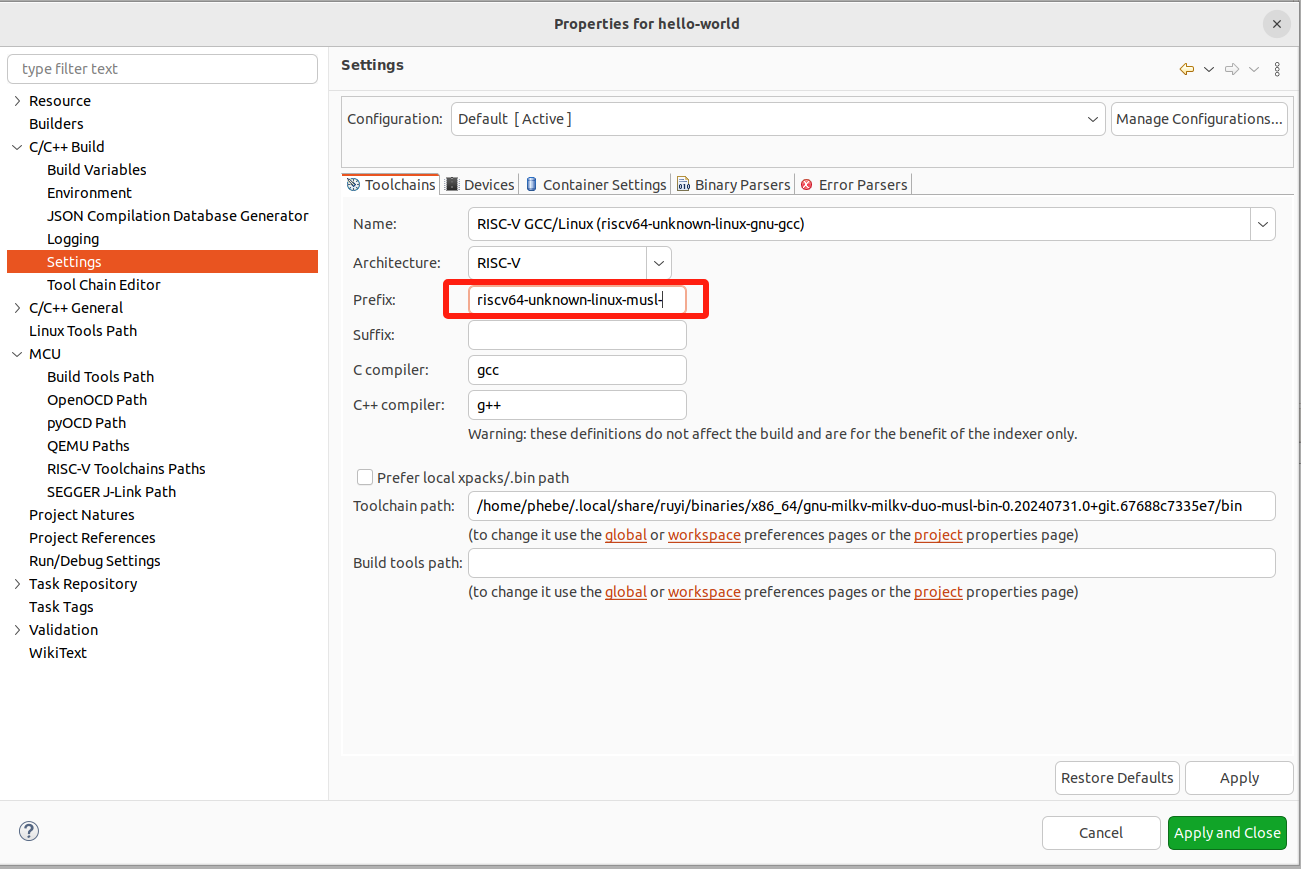
Project hello-world > Right-click > Properties to configure related properties
-
Configure the toolchain path for the project
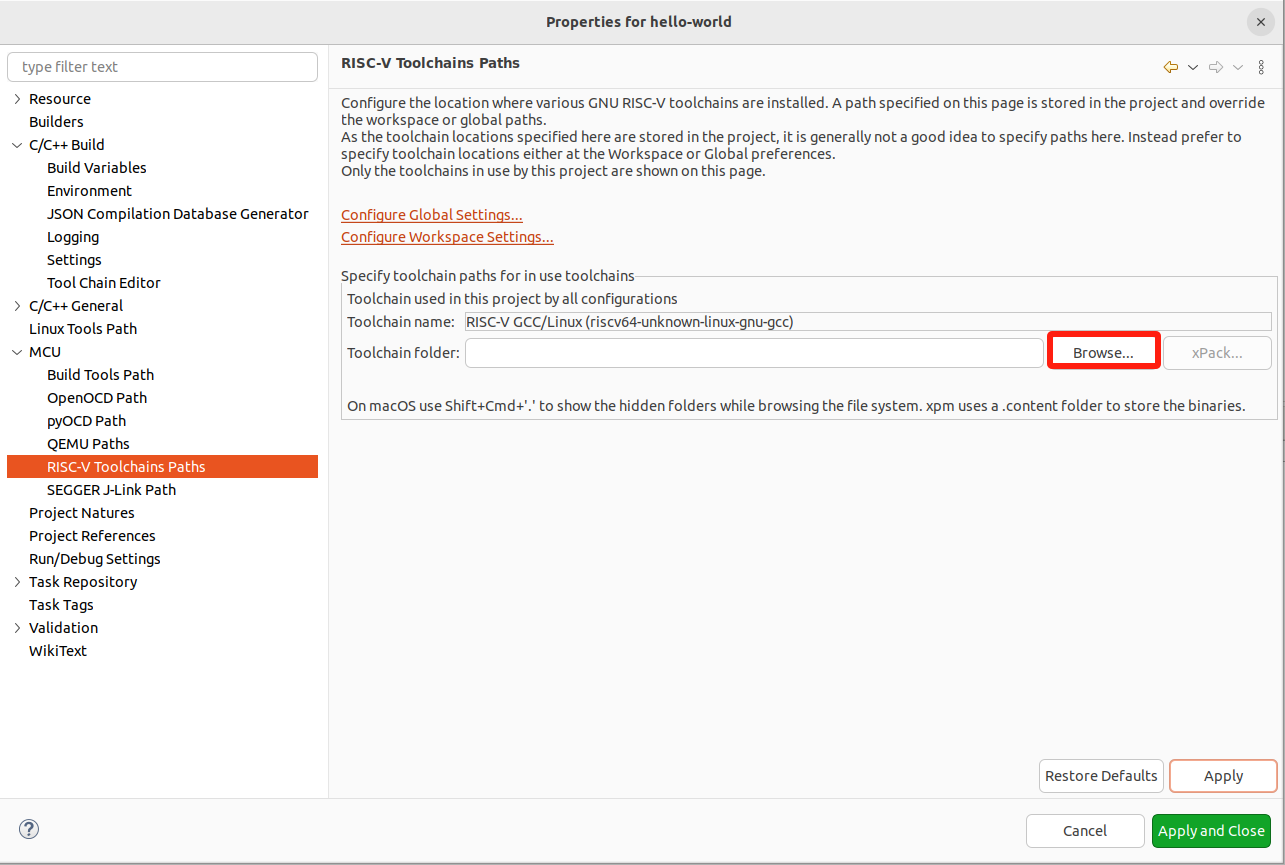
Select the path where the compiler was installed by ruyi install (default is under ~/.local/share/ruyi/binaries/x86_64/), or the bin directory under the created virtual environment.
-
Set compilation properties
-
-
Edit the Makefile
-
The project's built-in Makefile relies on the envsetup.sh script to pre-set environment variables. In the vendor documentation practice, we learned that the compiler prefix, compilation options, and linking parameters were pre-set. For convenience, these are written directly into the Makefile. Note that the TOOLCHAIN_PREFIX path needs to be modified as needed.
-
Compilation parameters:
- -mcpu=c906fdv : Specifies the target CPU model for cross-compilation
- -march=rv64imafdcv0p7xthead : Specifies the target architecture for cross-compilation
- -g :Generates debugging information
-
To automate copying the target program to the target device, the Makefile also includes an upload target (this assumes SSH authentication between the PC and the target device; refer to the "SSH Key Configuration" section at the end). Additionally, the relevant directory must be pre-created on the target device (the storage path is customizable, but ensure the scp command path matches the actual environment).
-
You can further modify the Makefile below; this is just a reference.
-
# Eclipse toolchain settings
#TOOLCHAIN_PREFIX := ~/milkv/duo/duo-examples/host-tools/gcc/riscv64-linux-musl-x86_64/bin/riscv64-unknown-linux-musl-
TOOLCHAIN_PREFIX := ~/.local/share/ruyi/binaries/x86_64/gnu-milkv-milkv-duo-musl-bin-0.20240731.0+git.67688c7335e7/bin/riscv64-unknown-linux-musl-

CFLAGS := -mcpu=c906fdv -march=rv64imafdcv0p7xthead -g
LDFLAGS :=

TARGET = helloworld

CC = $(TOOLCHAIN_PREFIX)gcc

SOURCE = $(wildcard *.c)
OBJS = $(patsubst %.c,%.o,$(SOURCE))

all: $(TARGET)

$(TARGET): $(OBJS)
   $(CC) $(CFLAGS) -o $@ $(OBJS) $(LDFLAGS)

%.o: %.c
   $(CC) $(CFLAGS) -o $@ -c $<

upload: $(TARGET)
   scp $(TARGET) root@192.168.42.1:/root/target/$(TARGET)

clean:
   rm -f *.o $(TARGET)

.PHONY: all clean upload-
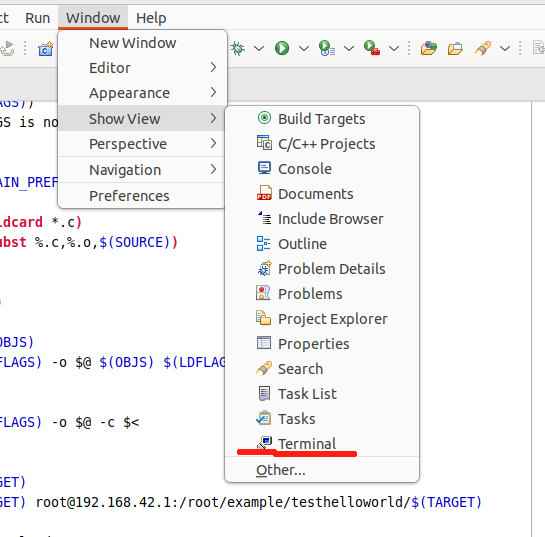
Open a Terminal window in the IDE, create an SSH Terminal to log into the target device and perform related operations. If needed, you can also create a Local Terminal window for combined use. This depends on personal preference. Specific steps:
-
Window > Show View > Terminal
-
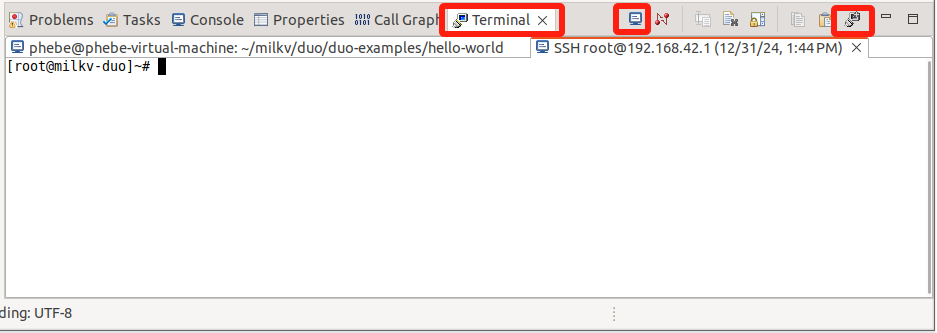
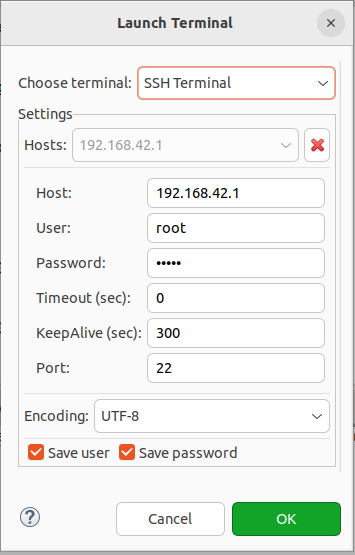
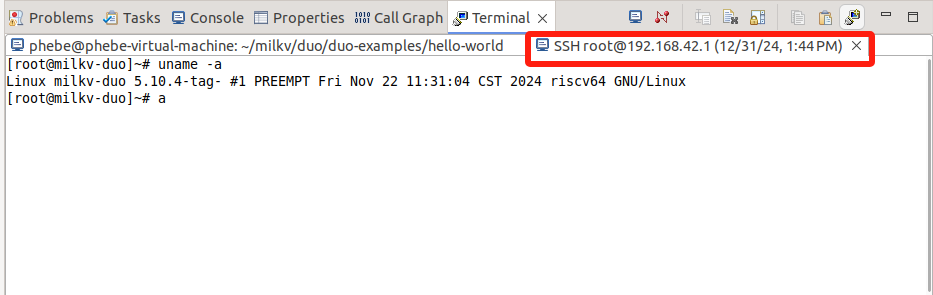
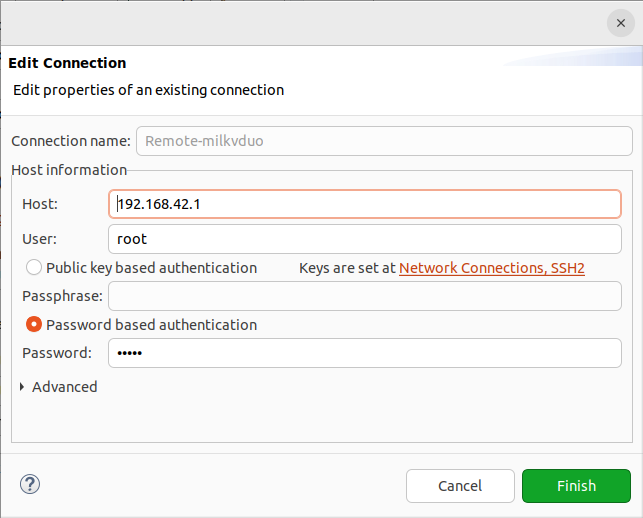
Terminal: Open a new Terminal View/Open a Terminal > SSH Terminal > Enter Host, User, Password (milkvduo's root password is: milkv) as shown below:
-
Before using the
scpcommand in the Makefile, make sure the corresponding directory structure has already been created on the target host. This ensures that files can be transferred to the correct destination path. After the build process completes, the target program will appear in the specified directory.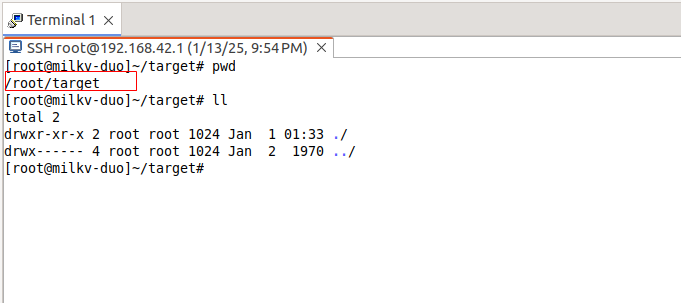
-
Executing the Build
After preparing the above configurations and modifications, right-click the project and click "Build Project". If the build is successful:
-
The Console window shows no errors.

-
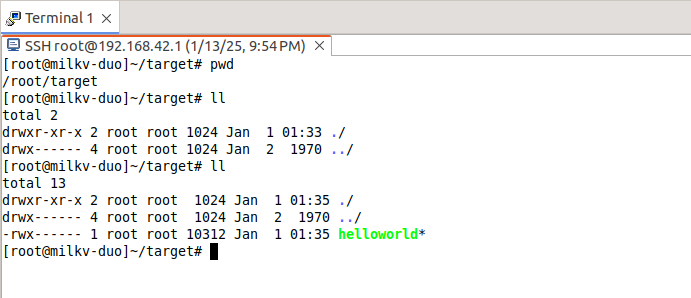
The SSH Terminal window shows the successfully transferred helloworld target program.
Transferring the Target Program to the Target Device
- If the upload target is defined in the Makefile, the target program transfer is already completed during the "Build Project" step.
- If the upload target is not defined in the Makefile, you can manually execute
scp helloworld root@192.168.42.1:/root/target/to transfer the target program.
Running the Target Program and Displaying Execution Results
There are multiple ways to run the target program in the IDE. Choose based on your habits and needs. Here are some methods I have tried; more methods are welcome.
SSH Terminal
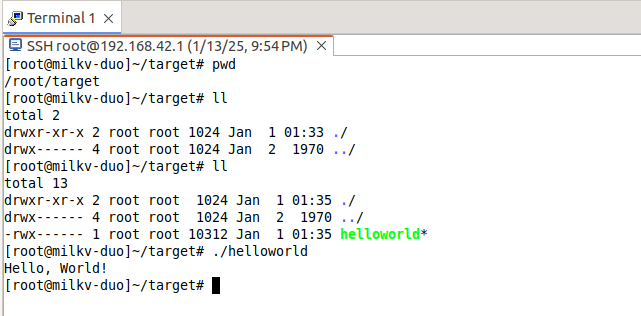
You can view and run the helloworld target program in the SSH Terminal window:
C/C++ Remote Application
Steps: Right-click the project > Run As > Run Configurations > C/C++ Remote Application
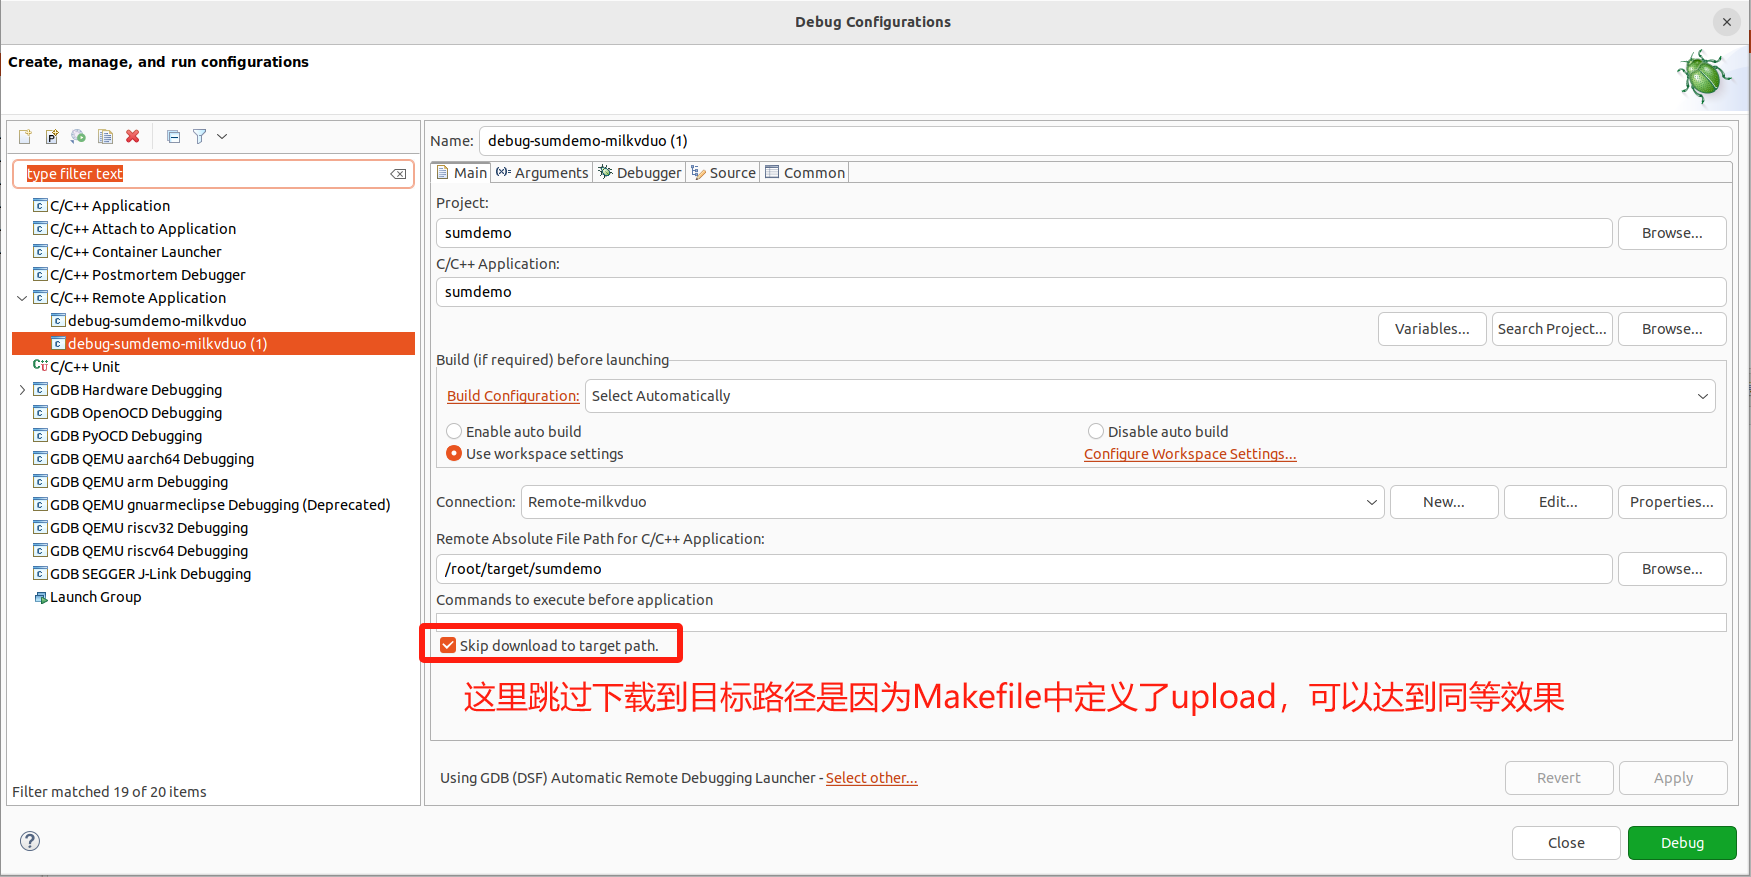
Refer to the image below (the image is a screenshot in Debug mode; since the configuration is the same, it is used to explain the key points). Configure the relevant parameters as follows:
-
Project: Default, i.e., the target program name
-
C/C++ Application: Also defaults to the target program name (Search Project to specify)
-
Connect:New > SSH
-
Remote Absolute File Path for C/C++ Application: Enter the absolute path of the target program on the RISC-V device (must match the path in the Makefile upload scp command)
-
Skip download to target path: It is recommended to check this in the current version and use the upload target in the Makefile to transfer the target program from the host to the target board. This is because, without checking, the IDE requires the RSE (Remote System Explorer) plugin, and the target device system must support sftp-server. Currently, milkvduo does not support sftp-server, so this feature is temporarily unavailable.
Running effect demonstration:
-
-
milkv duo img currently does not support sftp: https://github.com/milkv-duo/duo-buildroot-sdk/issues/167. This issue will be resolved when the milkvduo image supports sftp-server.
Debugging
Preparing the Debugging Example
The helloworld example is not ideal for debugging. To demonstrate debugging, breakpoints, and single-step tracking, another example is used here.
sumdemo.c
#include <stdio.h>

int Sum(int s, int e)
{
   int result = 0;
   for(int i = s; i <= e; i++)
   {
      result += i;
   }
   return result;
}


int main()
{
   int start = 1;
   int end = 10;
   printf("I will begin\n");
   int n = Sum(start, end);
   printf("running done, result is: [%d-%d]=%d\n", start, end, n);
   return 0;
}
Makefile:
# Toolchain prefix
TOOLCHAIN_PREFIX := ~/.local/share/ruyi/binaries/x86_64/gnu-milkv-milkv-duo-musl-bin-0.20240731.0+git.67688c7335e7/bin/riscv64-unknown-linux-musl-

# Compile options
CFLAGS := -mcpu=c906fdv -march=rv64imafdcv0p7xthead -g
LDFLAGS :=

# Target filename
TARGET = sumdemo

# Compiler
CC = $(TOOLCHAIN_PREFIX)gcc

# Source and object files
SOURCE = $(wildcard *.c)
OBJS = $(patsubst %.c,%.o,$(SOURCE))

# Default target
all: $(TARGET)

$(TARGET): $(OBJS)
	$(CC) $(CFLAGS) -o $@ $(OBJS) $(LDFLAGS)

%.o: %.c
	$(CC) $(CFLAGS) -o $@ -c $<

# Upload target
upload: $(TARGET)
	scp $(TARGET) root@192.168.42.1:/root/target/$(TARGET)

# Clean
clean:
	rm -f *.o $(TARGET)

.PHONY: all clean upload
Preparing gdbserver
The original buildroot image does not come with gdbserver. You can copy the original gdbserver executable or use RuyiSDK to add gdbserver and rebuild the image.
-
Download the original gdbserver executable: https://github.com/milkv-duo/duo-buildroot-sdk/blob/develop/ramdisk/rootfs/public/gdbserver/riscv_musl/usr/bin/gdbserver
-
Copy the downloaded gdbserver to the Milk-V Duo device's path:
bash
$ scp gdbserver root@192.168.42.1:/usr/bin/
$ ssh root@192.168.42.1 "chmod +x /usr/bin/gdbserver"
#### Debugging in Terminal

This operation is no different from debugging using the OS Terminal. Those accustomed to using commands can try this.

Terminal supports Local Terminal and SSH Terminal, among others. You can open a Local Terminal and an SSH Terminal connected to milkv duo for operations.

Steps for remote debugging using GDBServer + GDB commands:

1. On the milkvduo device (operate in the helloworld directory):

```bash
[root@milkv-duo]~/target# gdbserver :2345 ./sumdemo
Process ./sumdemo created; pid = 1802
Listening on port 2345-
On the PC (operate in the helloworld.c directory):
bash
$ cd ~/ews-milkvduo-t01/sumdemo
Check gdb version, start debugging
Use the ruyi virtual environment for debugging, activate the virtual environment, and compile in the virtual environment
$ source ~/venv-milkvduo/bin/ruyi-activate $ riscv64-unknown-linux-musl-gdb --version $ riscv64-unknown-linux-musl-gdb ./sumdemo
$ target remote 192.168.42.1:2345 #Port number must match the gdbserver side
$ break sumdemo.c:8 #Set a breakpoint at line 8
The following are commonly used; use as needed
$ c #Continue, resume program execution until the next breakpoint $ disp result #Track a variable, display its value each time it stops $ print result #Print the internal variable result


#### C/C++ Remote Application
Refer to the image below to configure the relevant parameters. Key points:
- Project: Default, i.e., the target program name
- C/C++ Application: Also defaults to the target program name (Search Project to specify)
- Connect: New > SSH
- Remote Absolute File Path for C/C++ Application: Enter the absolute path of the target program on the RISC-V device (must match the path in the Makefile upload scp command)
- Skip download to target path: It is recommended to check this in the current version and use the upload target in the Makefile to transfer the target program from the host to the target board. This is because, without checking, the IDE requires the RSE (Remote System Explorer) plugin, and the target device system must support sftp-server. Currently, milkvduo does not support sftp-server, so this feature is temporarily unavailable.
- Debugger > Main > GDB Debugger: Specify the GDB path. In this example, use `~/.local/share/ruyi/binaries/x86_64/gnu-milkv-milkv-duo-musl-bin-0.20240731.0+git.67688c7335e7/bin/riscv64-unknown-linux-musl-gdb`
- Debugger > GDB > GDBserver setting: Specify GDBServer and communication port


As with running, since milkv duo currently does not support sftp-server, the remote transfer function for the target program is unavailable, and execution will result in the following error.

Checking Skip download to target path skips downloading the target program, bypassing this issue. Use the upload definition in the Makefile to complete the target program transfer from the host to the target device during the build phase.

Running effect demonstration:
- 
- 
## Additional Notes
### SSH Key Configuration
Here is a detailed explanation of SSH key configuration:
By configuring SSH key-based passwordless login between the host and the Milk-V Duo, the system can automatically connect and transfer the compiled binary files to a specified path on the Milk-V Duo after the build process.
1. Execute `ssh-keygen` on the host
2. Add the public key to the Milk-V Duo:
```bash
$ cat ~/.ssh/xxxx.pub | ssh root@192.168.42.1 'mkdir -p ~/.ssh && cat >> ~/.ssh/authorized_keys'- Verify:
ssh root@192.168.42.1
If successful, you will no longer need to enter a password.