Milkv Duo :使用 riscv64-unknown-linux-musl-bin 工具链编译、运行、调试
编译环境搭建
-
安装 RuyiSDK 包管理器 参考
-
安装编译工具链,本文以
gnu-milkv-milkv-duo-musl编译器举例(您可以根据需要修改工具链及版本):>_bash# 查看软件源的资��源 $ ruyi list --name-contains milkv --category-is toolchain # 安装指定的工具链 $ ruyi install gnu-milkv-milkv-duo-musl-bin # 从返回信息中可以查看安装的路径,如 ~/.local/share/ruyi/binaries/x86_64/gnu-milkv-milkv-duo-musl-bin-0.20240731.0+git.67688c7335e7 -
创建和使用Duo编译环境
>_bash# 查看ruyi预配置环境 $ ruyi list profiles # 创建一个虚拟环境:工具链为gnu-milkv-milkv-duo-musl-bin $ ruyi venv -t gnu-milkv-milkv-duo-musl-bin milkv-duo ./venv-milkvduo
在IDE中开发
源码准备
本文以 milkv-duo 开发板的应用示例 duo-examples 为例。使用下面任一方式获取源码:
# 方法一:git clone
$ git clone https://github.com/milkv-duo/duo-examples.git

# 方法二:ruyi extract 命令下载
$ ruyi extract milkv-duo-examples导入并�设置工程属性
-
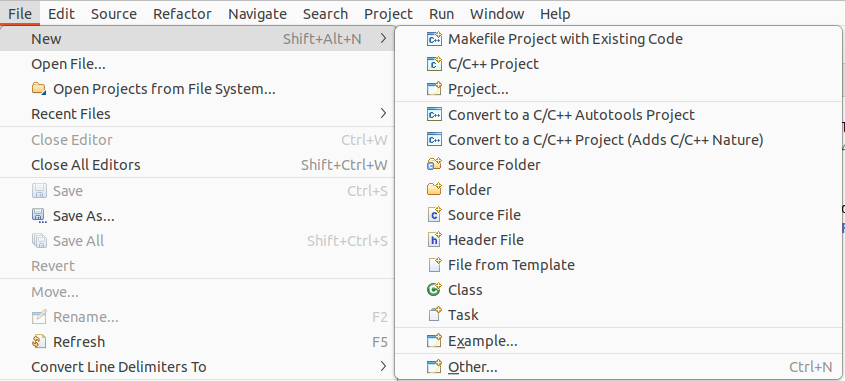
File > New > Project
-
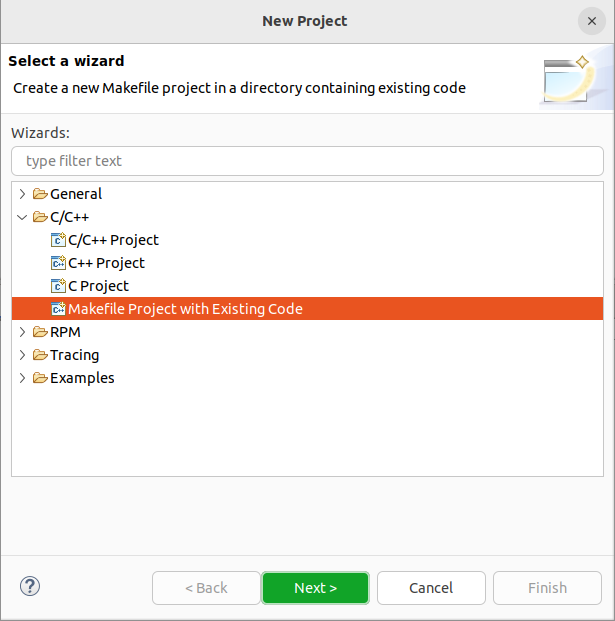
选择 C/C++ > Makefile Project with Existing Code > Next
-
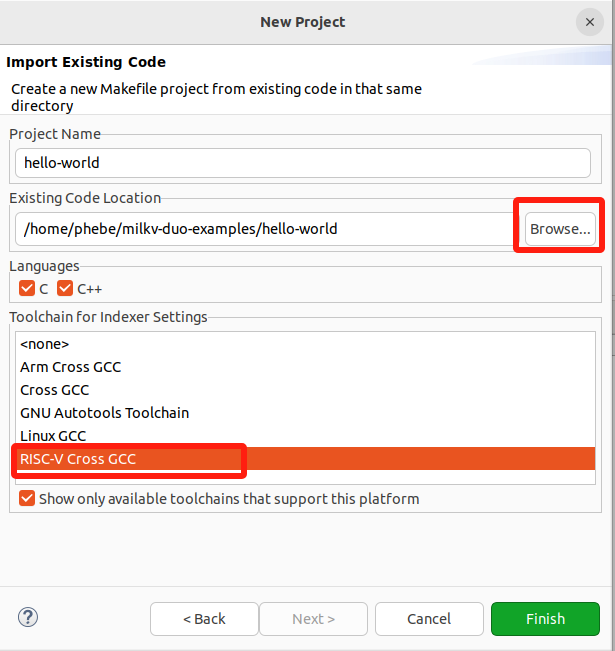
导入准备好的源码:
-
点击 Browse > 目标源码路径
-
Toolchain for Indexer Settings :选择 RISC-V Cross GCC
-
Finish
-
-
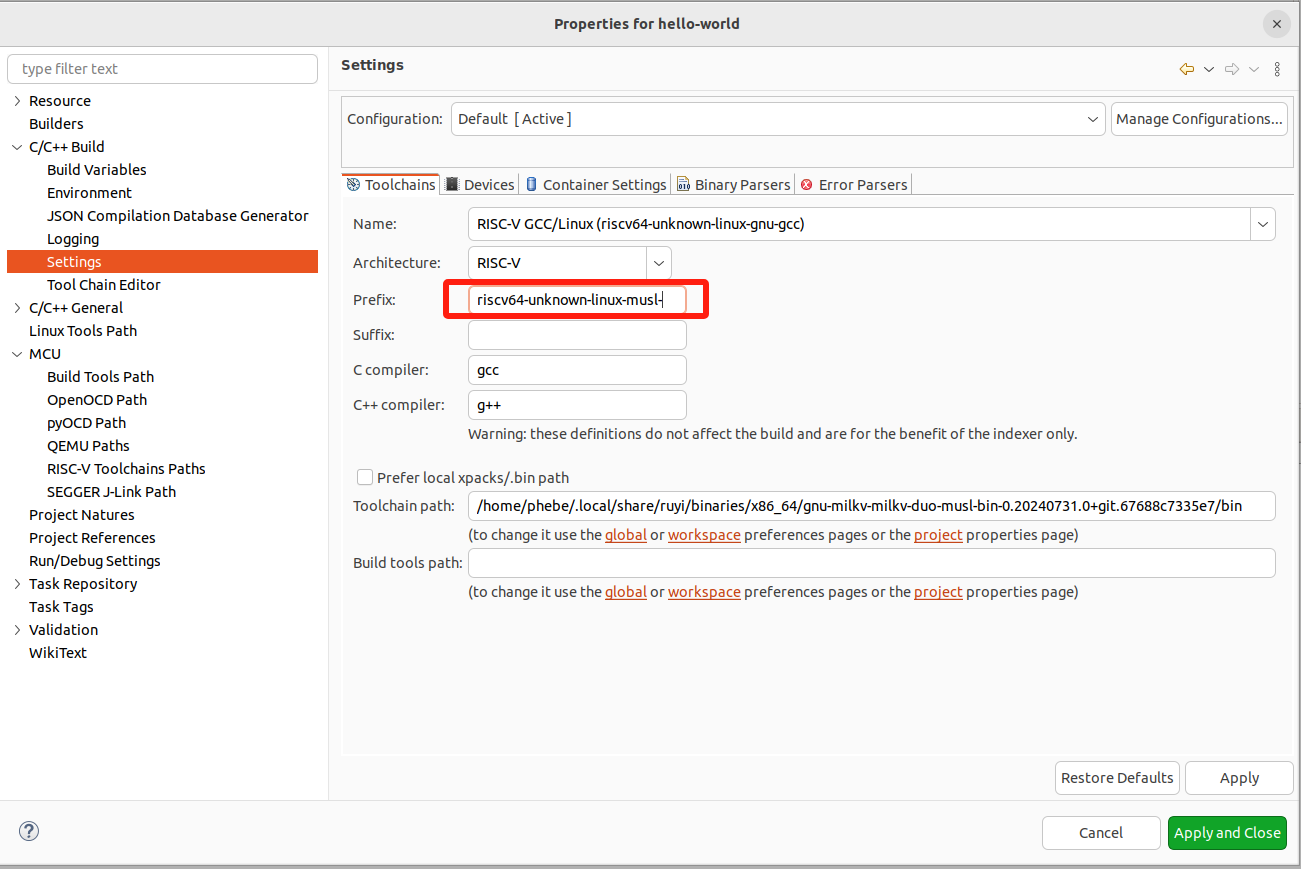
工程 hello-world > 右键 > Properties 配置相关属性
-
为工程配置工具链路径
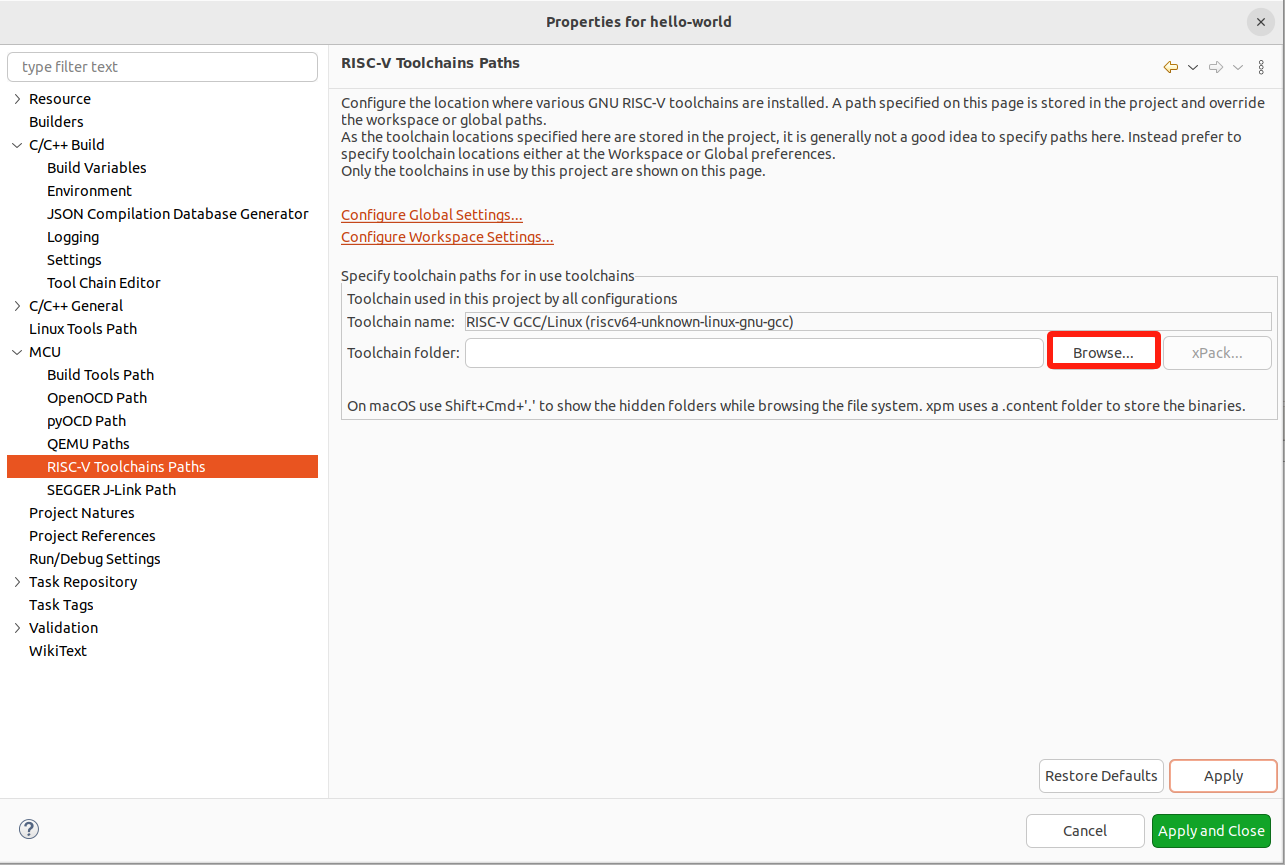
选择之前ruyi install 安装编译器的路径(默认在~/.local/share/ruyi/binaries/x86_64/ 路径下),或者创建的虚拟环境下的bin目录;
-
设置编译属性
-
-
编辑 Makefile
-
项目自带的 Makefile 的正确运行依赖于 envsetup.sh 脚本对环境变量的预先设置。之前在厂商文档操作实践中,我们了解到预先设置了编译器前缀、编译选项、链接参数等信息,为了方便,将这些信息写到 Makefile 中指定。注意 TOOLCHAIN_PREFIX 路径需要按需修改。
-
编译参数:
- -mcpu=c906fdv :指定交叉编译时目标 CPU 的型号
- -march=rv64imafdcv0p7xthead :指定交叉编译时目标架构
- -g :生成调试信息
-
为了实现从构建到目标程序的自动拷贝到目标设备,Makefile中还增加了upload目标(这是建立在PC和目标设备完成SSH认证的前提下,请参考文末“SSH秘钥配置”),同时还需要预先在目标设备上建好相关的目录(存放路径自定义,但请修改scp命令后的路径确保和实际环境一致)。
-
您还可以在下面 Makefile 的基础上继续修改,本文只是提供一种参考。
makefile# Eclipse 工具链设置 #TOOLCHAIN_PREFIX := ~/milkv/duo/duo-examples/host-tools/gcc/riscv64-linux-musl-x86_64/bin/riscv64-unknown-linux-musl- TOOLCHAIN_PREFIX := ~/.local/share/ruyi/binaries/x86_64/gnu-milkv-milkv-duo-musl-bin-0.20240731.0+git.67688c7335e7/bin/riscv64-unknown-linux-musl- CFLAGS := -mcpu=c906fdv -march=rv64imafdcv0p7xthead -g LDFLAGS := TARGET = helloworld CC = $(TOOLCHAIN_PREFIX)gcc SOURCE = $(wildcard *.c) OBJS = $(patsubst %.c,%.o,$(SOURCE)) all: $(TARGET) $(TARGET): $(OBJS) $(CC) $(CFLAGS) -o $@ $(OBJS) $(LDFLAGS) %.o: %.c $(CC) $(CFLAGS) -o $@ -c $< upload: $(TARGET) scp $(TARGET) root@192.168.42.1:/root/target/$(TARGET) clean: rm -f *.o $(TARGET) .PHONY: all clean upload
-
-
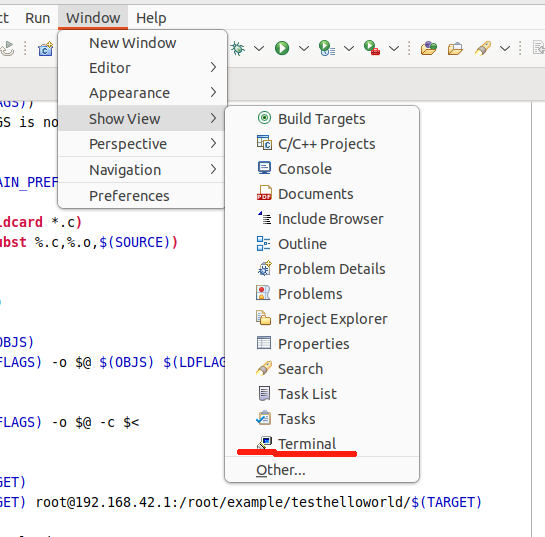
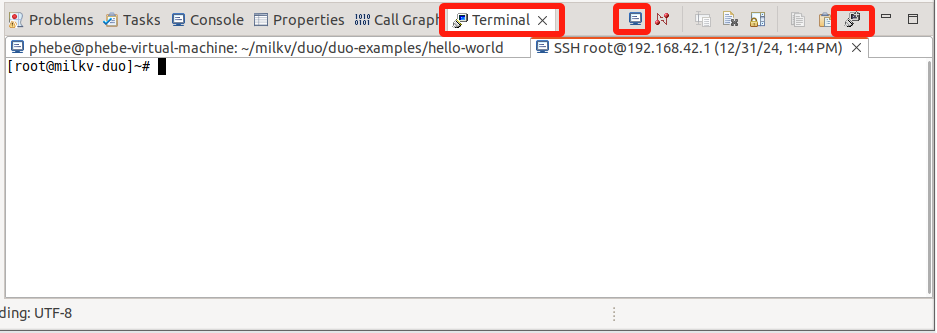
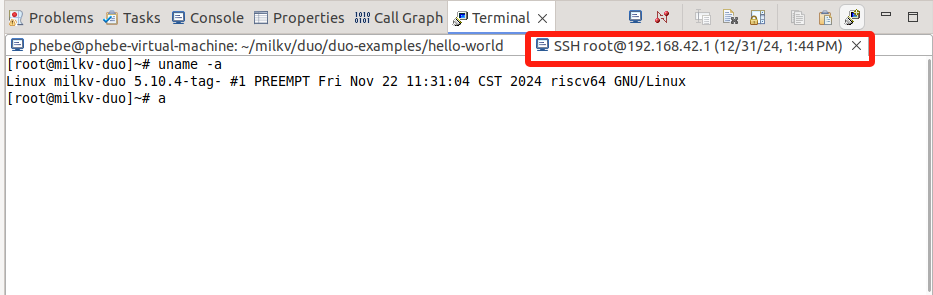
在IDE中打开 Terminal 视窗,创建一个 SSH Terminal,方便在IDE中登录目标设备并进行相关操作。如果需要,同时也可以再创建一个 Local Terminal 窗口��配合使用。这个根据个人习惯自行选择。具体操作:
-
Window > Show View > Terminal
-
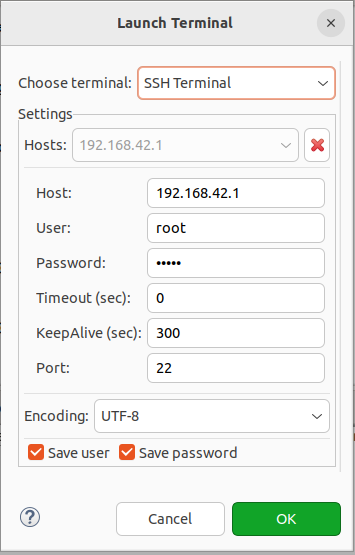
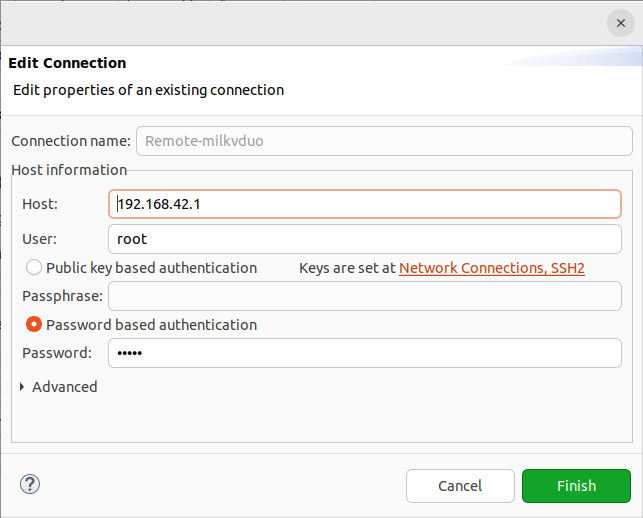
Terminal: Open a new Terminal View/Open a Terminal > SSH Terminal > 对照下图输入Host、User、Password(milkvduo的root密码是:milkv)
-
使用 Makefile 中的
scp命令前,需要在目标主机上提前创建好对应的目录结构,这样文件能够正确被传输到目标目录。构建完成后,目录下将会出现目标程序。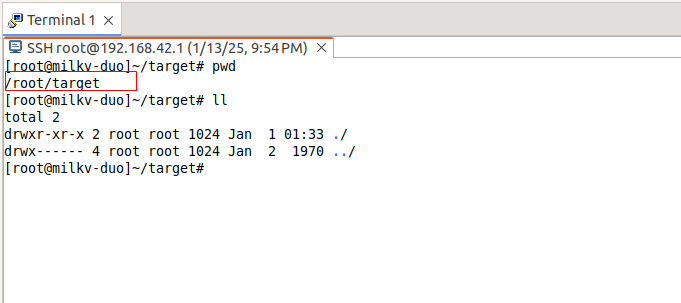
-
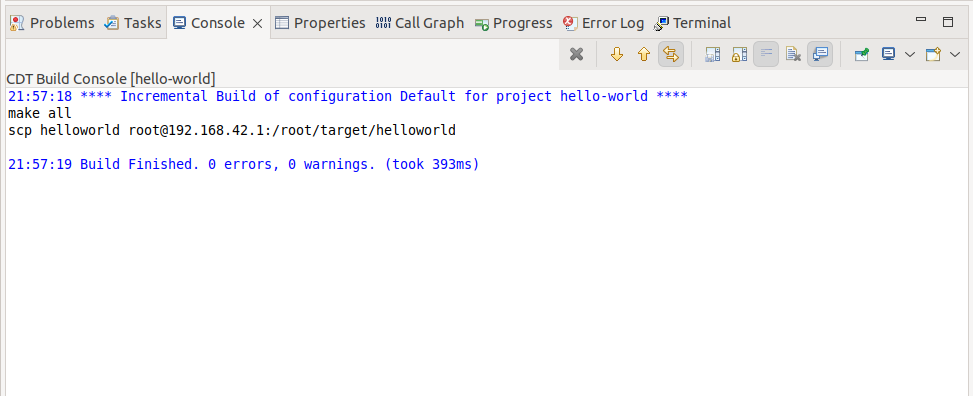
执行构建
准备好上述配置和修改之后,右键工程,点 “Build Project”,构建成功则:
-
Console 窗口无错误
-
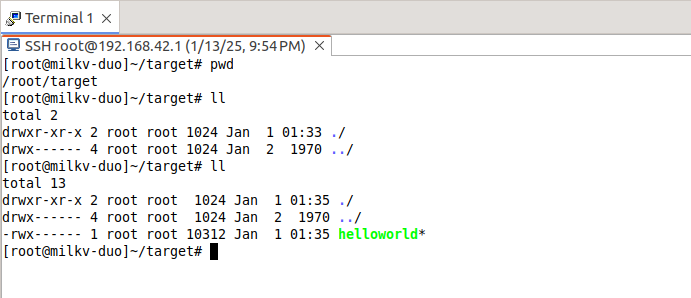
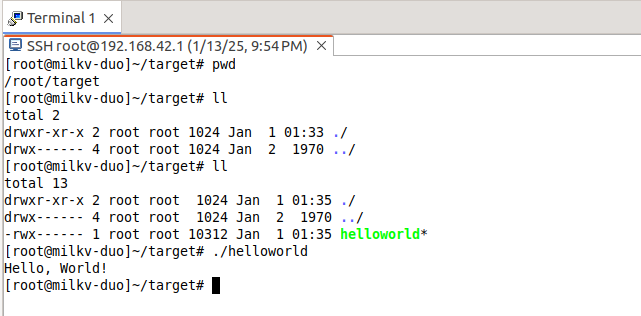
SSH Terminal窗口已经能够看到成功传输的helloworld目标程序
将目标程序传输到目标设备
- 如果 Makefile 中定义了 upload 目标,则在上面 "Build Project" 时,已经完成了目标程序的传输。
- 如果 Makefile 中未定义 upload 目标,则可以手动执行
scp helloworld root@192.168.42.1:/root/target/命令完成目标程序的传输。
运行目标程序并回显执行结果
在IDE中有多种方式可以支持运行目标程序,可以按照习惯和需求选择。这里列举了一些我尝试通过的方式,更多方式欢迎一起探索。
SSH Terminal
可以在 SSH Terminal 窗口中查看 helloworld 目标程序,并运行:
C/C++ Remote Application
操作:右键项目 > Run As > Run Configurations > C/C++ Remote Application
对照下面的图(图是Debug模式下截图,由于配置是一样的,借Debug的图说明配置要点),参考着配置相关参数,重点如下:
-
Project:默认,即target程序名
-
C/C++ Application : 也默认是target程序名(Search Project查询指定)
-
Connect:New > SSH
-
Remote Absolute File Path for C/C++ Application : 输入在RISC-V设备上目标程序的绝对地址(本例中需要与Makefile upload的scp命令中的路径一致)
-
Skip download to target path:当前版本这里建议勾选,并搭配在Makefile中定义upload目标来实现目标程序从主机传输到目标开发板上。这是因为不勾选的情况下,需要IDE安装RSE(Remote System Explorer)插件,并且要求目标设备系统支持 sftp-server。目前 milkvduo 上不支持 sftp-server,所以暂时不支持该功能。
运行效果展示:
-
-
milkv duo img 目前不支持sftp:https://github.com/milkv-duo/duo-buildroot-sdk/issues/167 当milvduo镜像支持 sftp-server 后该问题能够解决。
调试
准备调试示例
helloworld的示例调试效果不佳,为了体现调试、打断点、单步跟踪等功能,这里换了另一个示例。
sumdemo.c
#include <stdio.h>

int Sum(int s, int e)
{
   int result = 0;
   for(int i = s; i <= e; i++)
   {
      result += i;
   }
   return result;
}


int main()
{
   int start = 1;
   int end = 10;
   printf("I will begin\n");
   int n = Sum(start, end);
   printf("running done, result is: [%d-%d]=%d\n", start, end, n);
   return 0;
}
Makefile:
# 工具链前缀
TOOLCHAIN_PREFIX := ~/.local/share/ruyi/binaries/x86_64/gnu-milkv-milkv-duo-musl-bin-0.20240731.0+git.67688c7335e7/bin/riscv64-unknown-linux-musl-

# 编译选项
CFLAGS := -mcpu=c906fdv -march=rv64imafdcv0p7xthead -g
LDFLAGS :=

# 目标文件名
TARGET = sumdemo

# 编译器
CC = $(TOOLCHAIN_PREFIX)gcc

# 源文件与目标文件
SOURCE = $(wildcard *.c)
OBJS = $(patsubst %.c,%.o,$(SOURCE))

# 默认目标
all: $(TARGET)

$(TARGET): $(OBJS)
	$(CC) $(CFLAGS) -o $@ $(OBJS) $(LDFLAGS)

%.o: %.c
	$(CC) $(CFLAGS) -o $@ -c $<

# 上传目标
upload: $(TARGET)
	scp $(TARGET) root@192.168.42.1:/root/target/$(TARGET)

# 清理
clean:
	rm -f *.o $(TARGET)

.PHONY: all clean upload
准备gdbserver
原厂 buildroot 镜像不自带 gdbsever,可拷贝原厂gdbserver可执行文件或使用 RuyiSDK 添加 gdbsever 后重新构建的镜像。
-
下载原厂gdbserver可执行程序:https://github.com/milkv-duo/duo-buildroot-sdk/blob/develop/ramdisk/rootfs/public/gdbserver/riscv_musl/usr/bin/gdbserver
-
将上述下载的gdbserver拷贝到milkv duo设备的path路径下:
>_bash$ scp gdbserver root@192.168.42.1:/usr/bin/ $ ssh root@192.168.42.1 "chmod +x /usr/bin/gdbserver"
Terminal中调试
这种操作跟使用操作系统的Terminal调试无差别,习惯使用命令的可以尝试。
Terminal支持 Local Terminal 和 SSH Terminal等多种方式,��可以同时开一个Local Terminal 和 一个 SSH Terminal 连到milkv duo上,进行操作。
GDBServer + GDB命令远程调试的步骤如下:
-
milkvduo设备端(helloworld所在目录下操作):
>_bash[root@milkv-duo]~/target# gdbserver :2345 ./sumdemo Process ./sumdemo created; pid = 1802 Listening on port 2345 -
PC端(helloworld.c所在目录下操作):
>_bash$ cd ~/ews-milkvduo-t01/sumdemo # 查看gdb版本,启动调试 # 这里使用 ruyi 虚拟环境进行调试,激活虚拟环境,在虚拟环境下编译 $ source ~/venv-milkvduo/bin/ruyi-activate $ riscv64-unknown-linux-musl-gdb --version $ riscv64-unknown-linux-musl-gdb ./sumdemo $ target remote 192.168.42.1:2345 #端口号需要跟gdbserver端一致 $ break sumdemo.c:8 #在第8行设置断点 # 下面几个可能常用,请按需灵活使用 $ c #contuinu,继续程序的运行,直到遇到下一个断点 $ disp result #跟踪查看某个变量,每次停下来都显示它的值 $ print result #打印内部变量result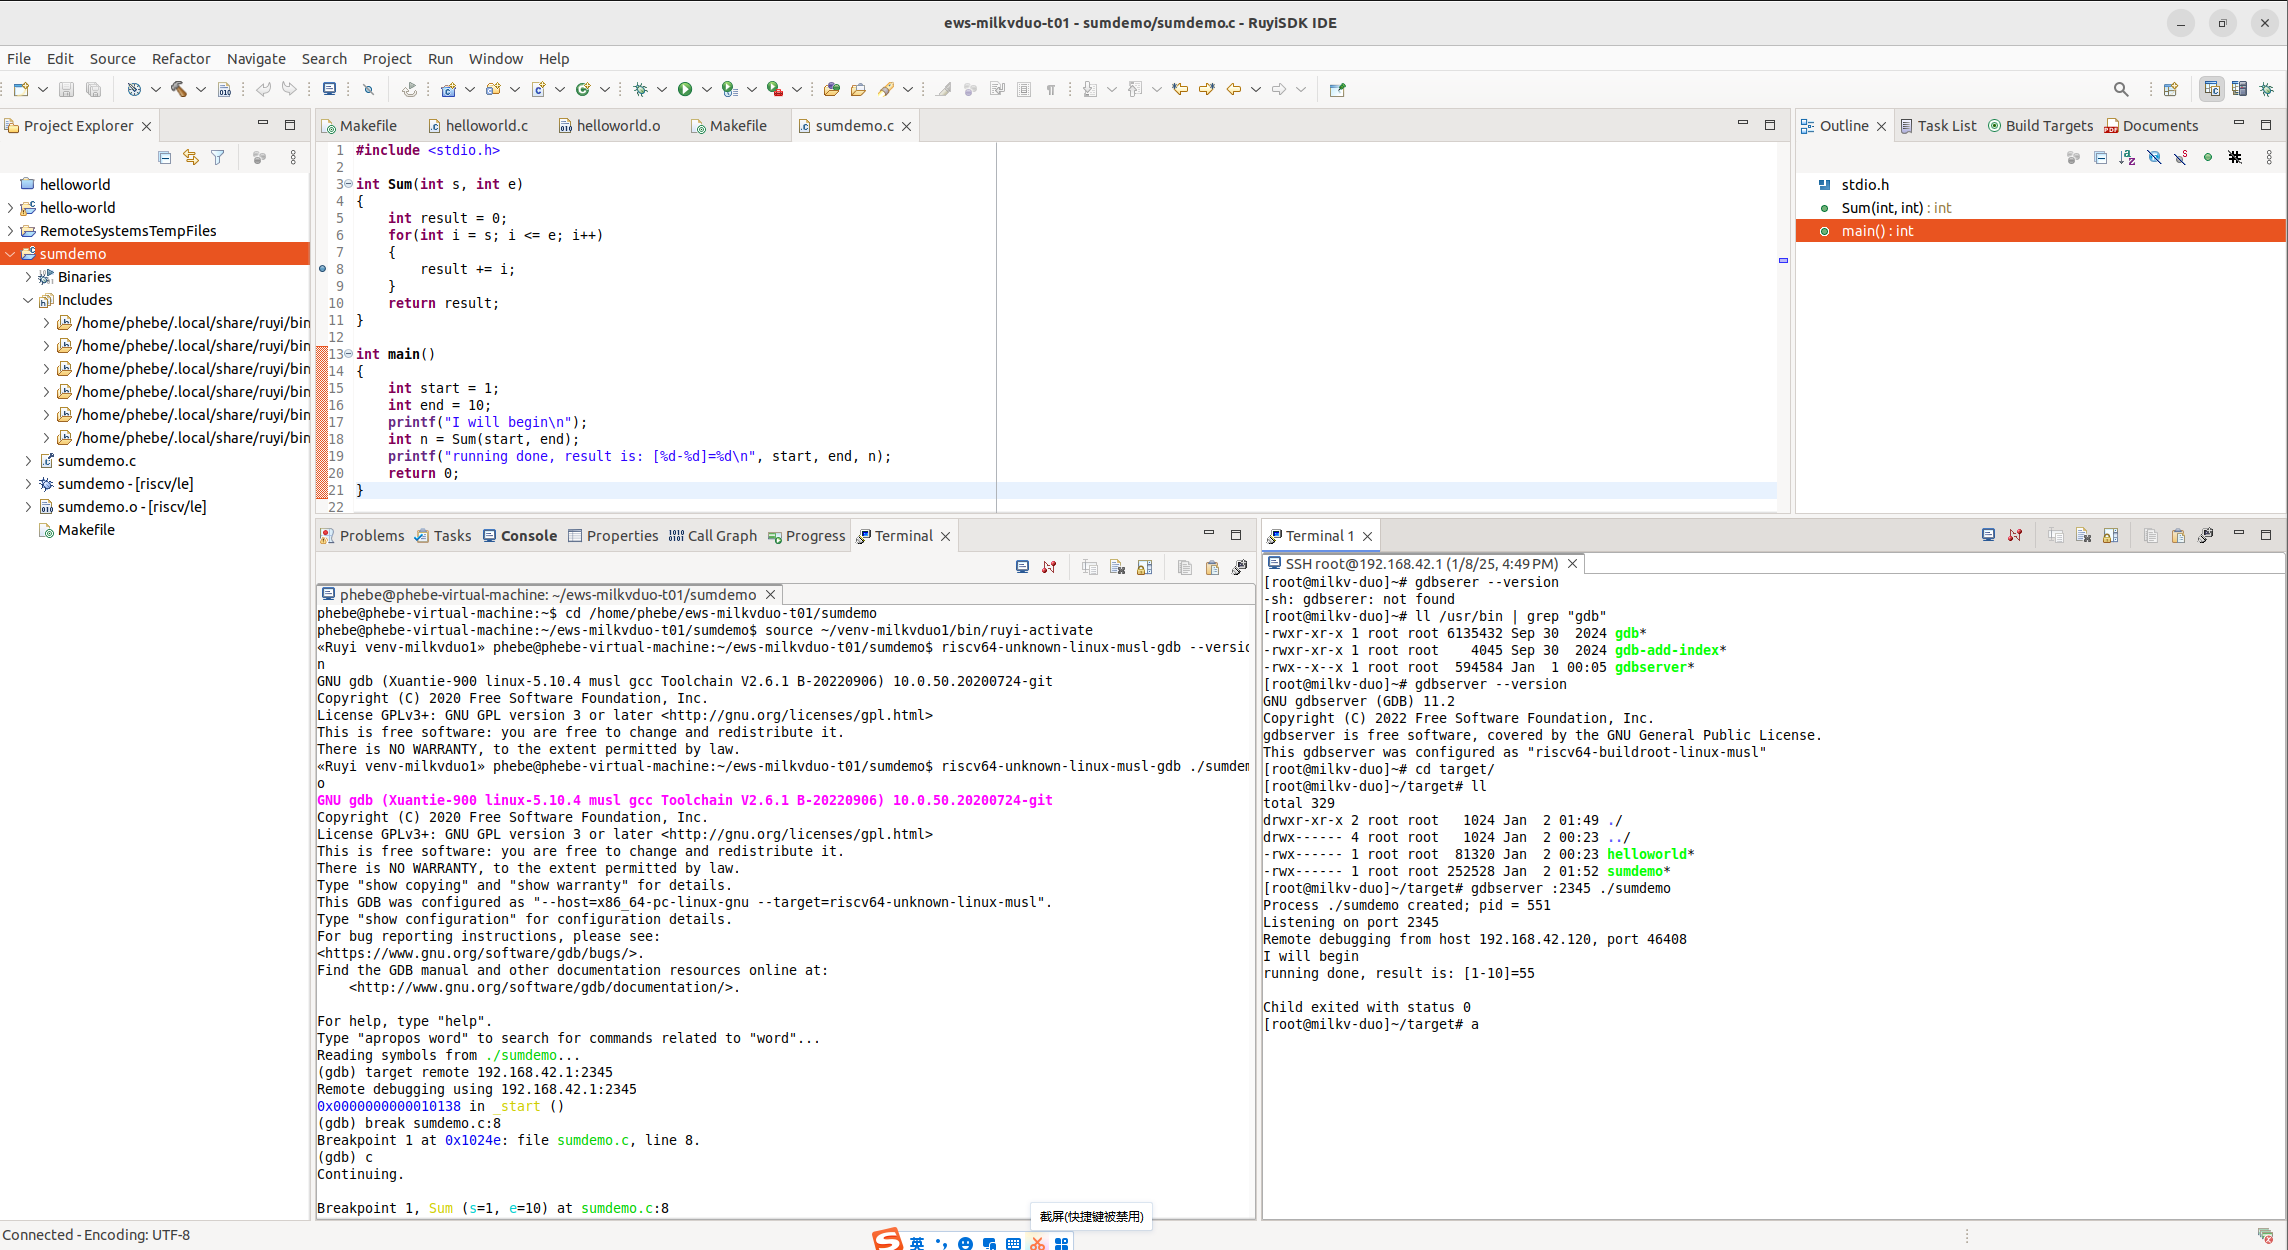
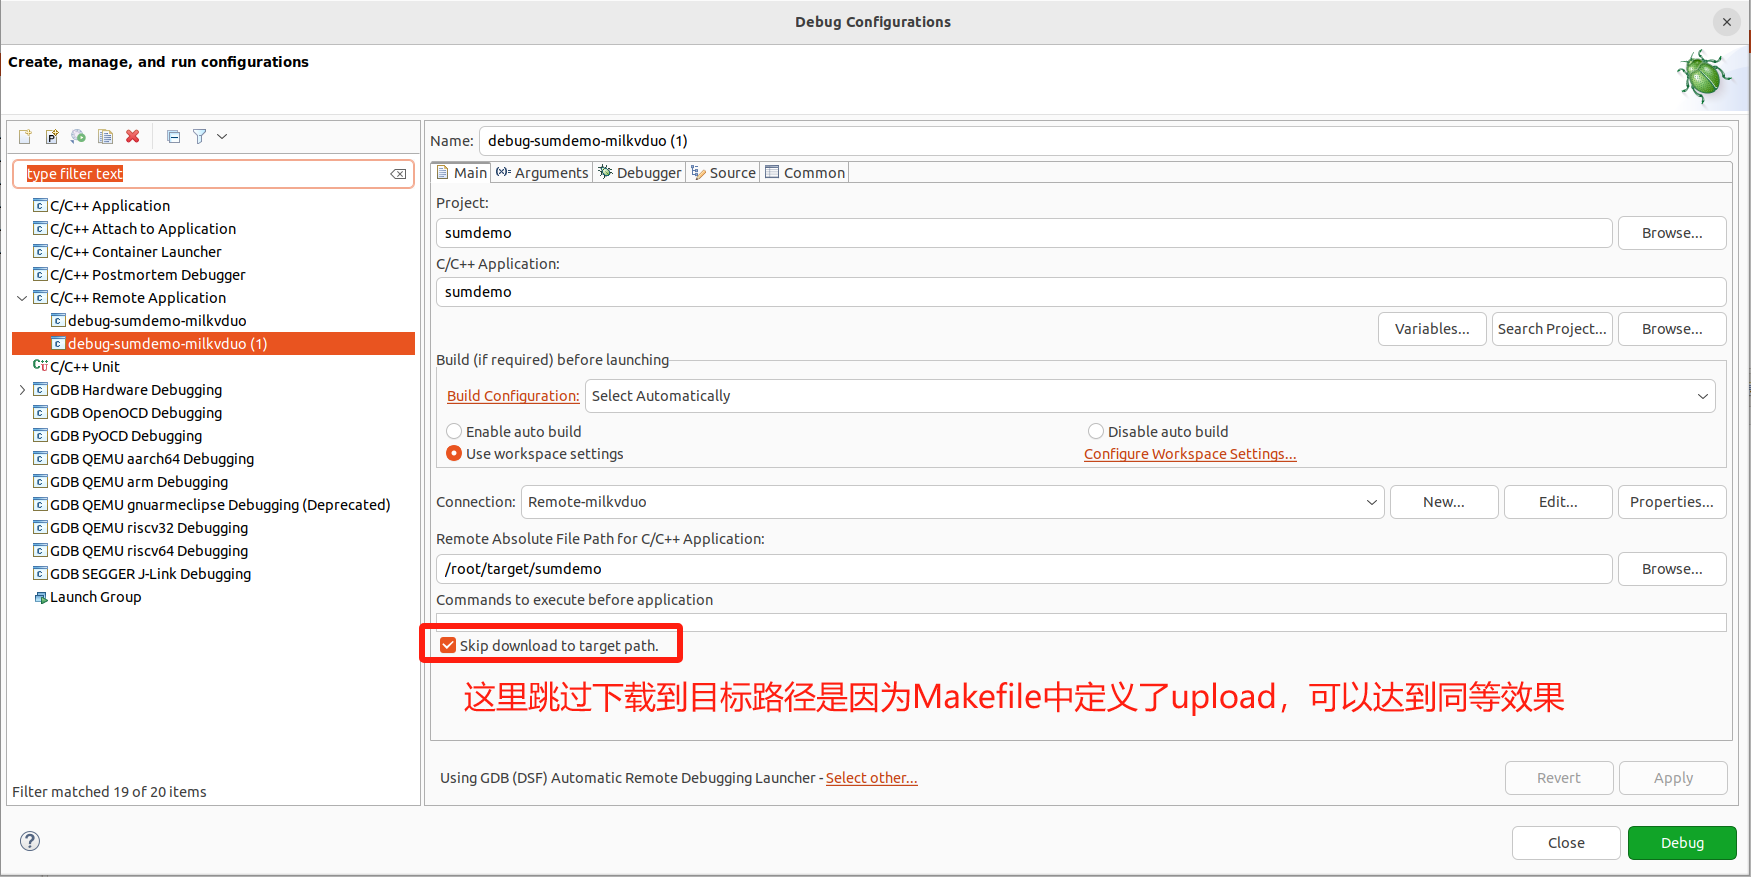
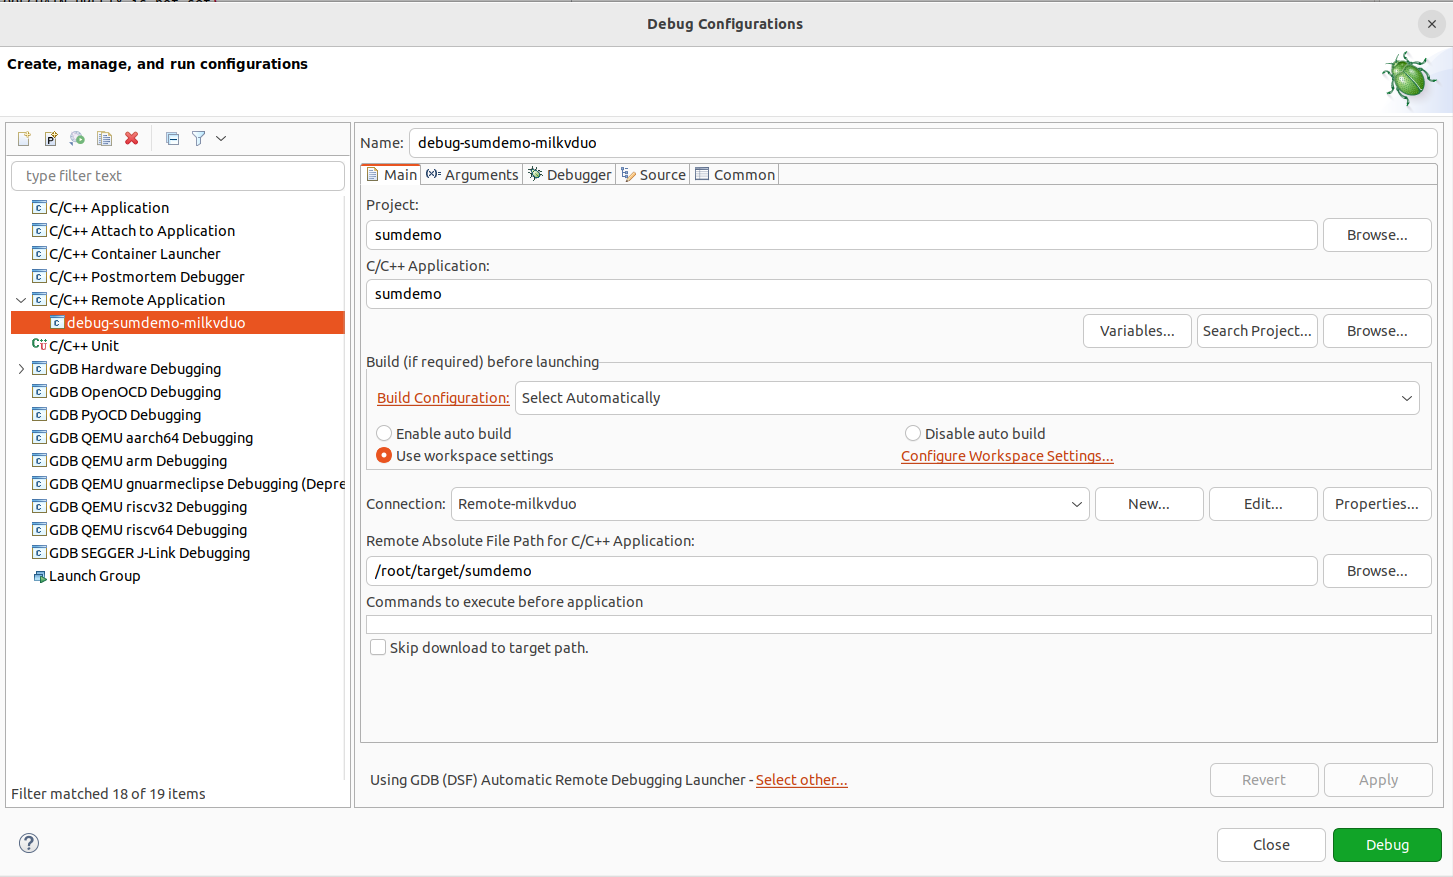
C/C++ Remote Application
对照下面的图,参考着配置相关参数,重点如下:
-
Project:默认,即 target 程序名
-
C/C++ Application : 也默认是target程序名(Search Project查询指定)
-
Connect:New > SSH
-
Remote Absolute File Path for C/C++ Application : 输入在RISC-V设备上目标程序的绝对地址(本例中需要与Makefile upload的scp命令中的路径一致)
-
Skip download to target path:当前版本这里建议勾选,并搭配在Makefile中定义upload目标来实现目标程序从主机传输到目标开发板上。这是因为不勾选的情况下,需要IDE安装RSE(Remote System Explorer)插件,并且要求目标设备系统支持 sftp-server。目前 milkvduo 上不支持 sftp-server,所以暂时不支持该功能。
-
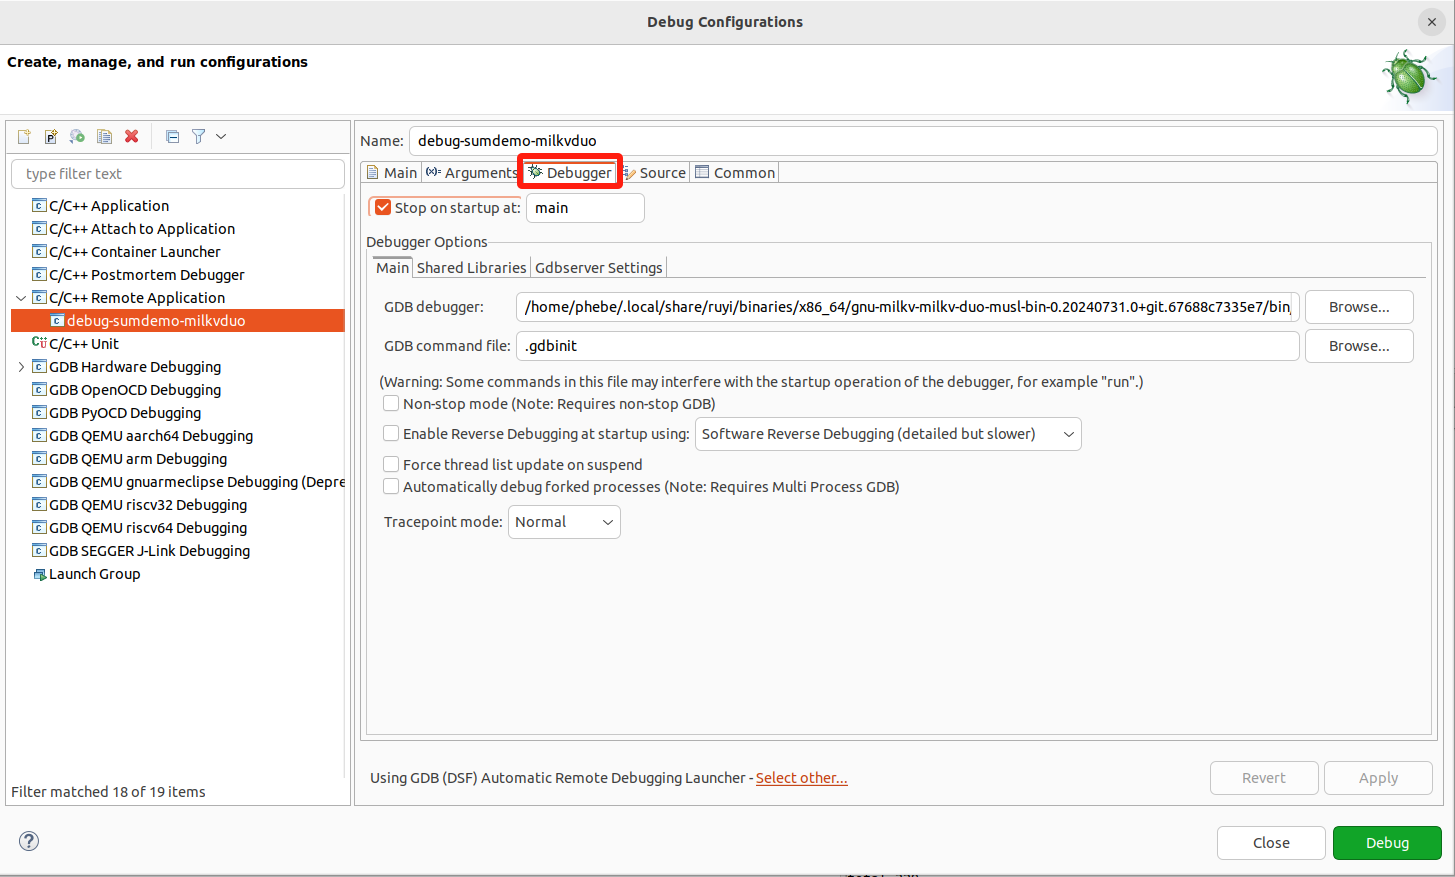
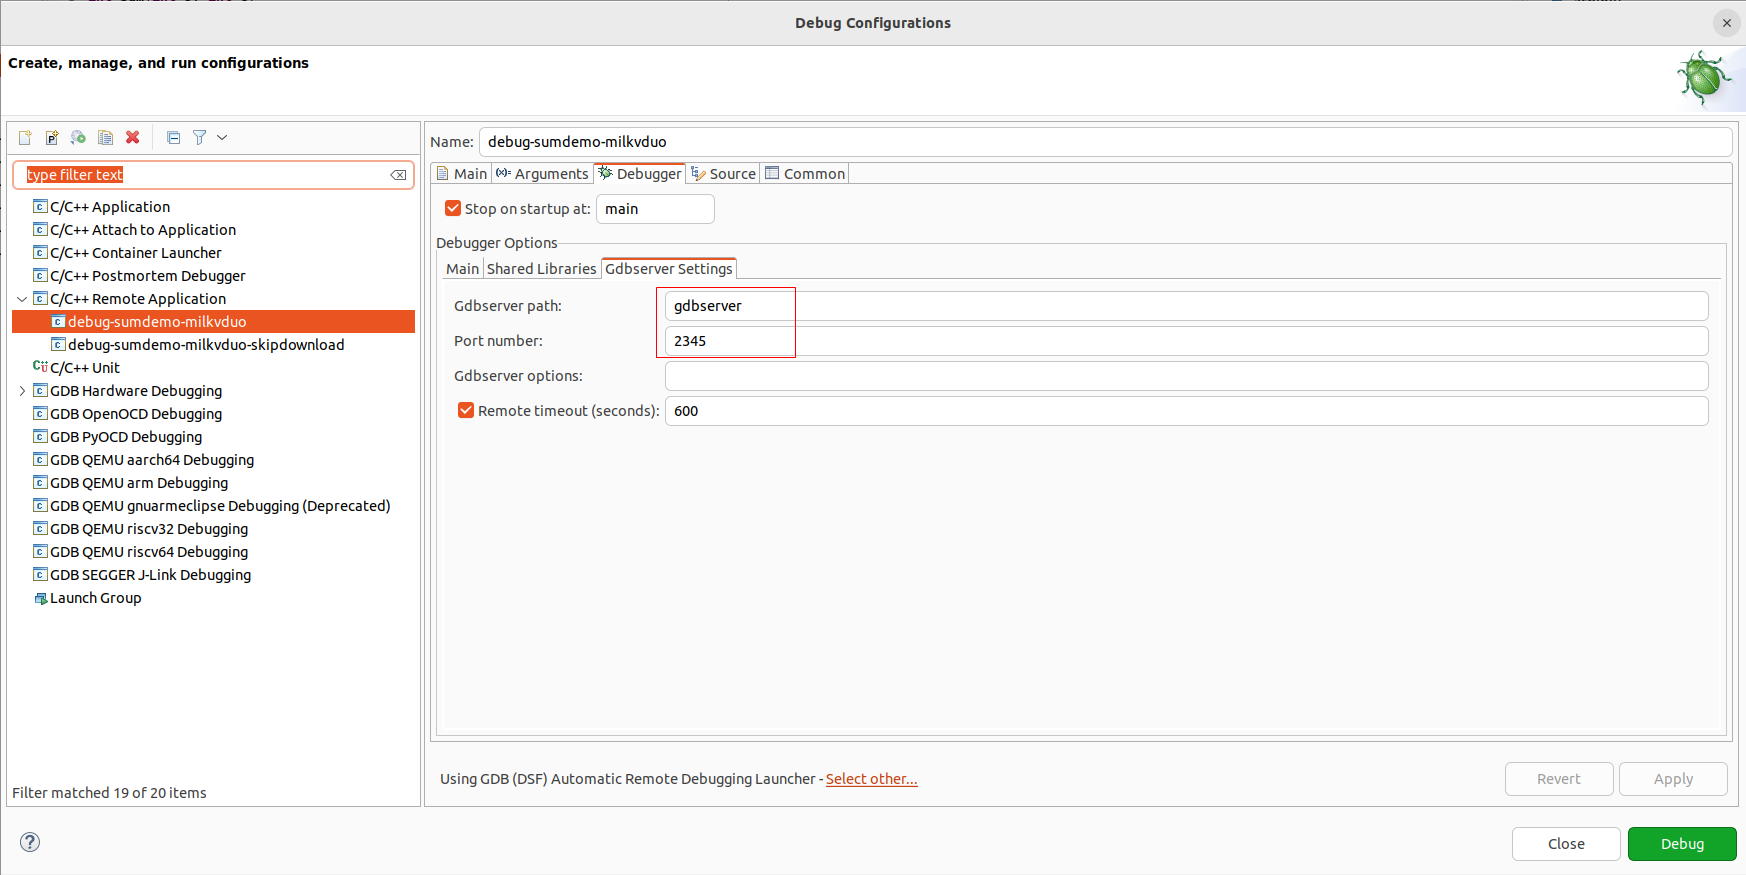
Debugger > Main > GDB Debugger : 指定GDB的路径。本例中使用的是
~/.local/share/ruyi/binaries/x86_64/gnu-milkv-milkv-duo-musl-bin-0.20240731.0+git.67688c7335e7/bin/riscv64-unknown-linux-musl-gdb -
Debugger > GDB > GDBserver setting: 指定GDBServer 及通信端�口
跟运行一样,由于目前 milkv duo 不支持 sftp-server,因此目标程序的远端传输功能不可用,执行会报如下的错误。
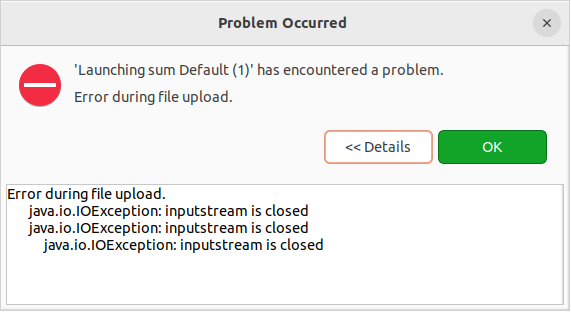
勾选 Skip download to target path 跳过下载目标程序,就能绕过这个问题。配合Makefile中的upload定义,在构建阶段就完成目标程序从主机传输到目标设备中。
运行效果展示:
补充说明
SSH秘钥配置
这里详细说明下 SSH 秘钥配置:
通过为 host 和 milkv duo 配置 ssh-key 免密登录,从而实现构建后自动将二进制文件连接并传输到milkv duo的指定路径下。
-
在 host上执行
ssh-keygen -
将公钥添加到milkv duo上:
$ cat ~/.ssh/xxxx.pub | ssh root@192.168.42.1 'mkdir -p ~/.ssh && cat >> ~/.ssh/authorized_keys'- 验证:
ssh root@192.168.42.1
成功的情况下此时不需要再输入密码了。